Showing posts with label Valentine's Day. Show all posts

Tuesday, January 20, 2015

Magnolia-licious - Love is in the Air


Hello, Magnolia Friends. Today is Team B’s turn to share some inspiration for the current challenge…

*****LOVE IS IN THE AIR*****

This challenge will run until January 26th.


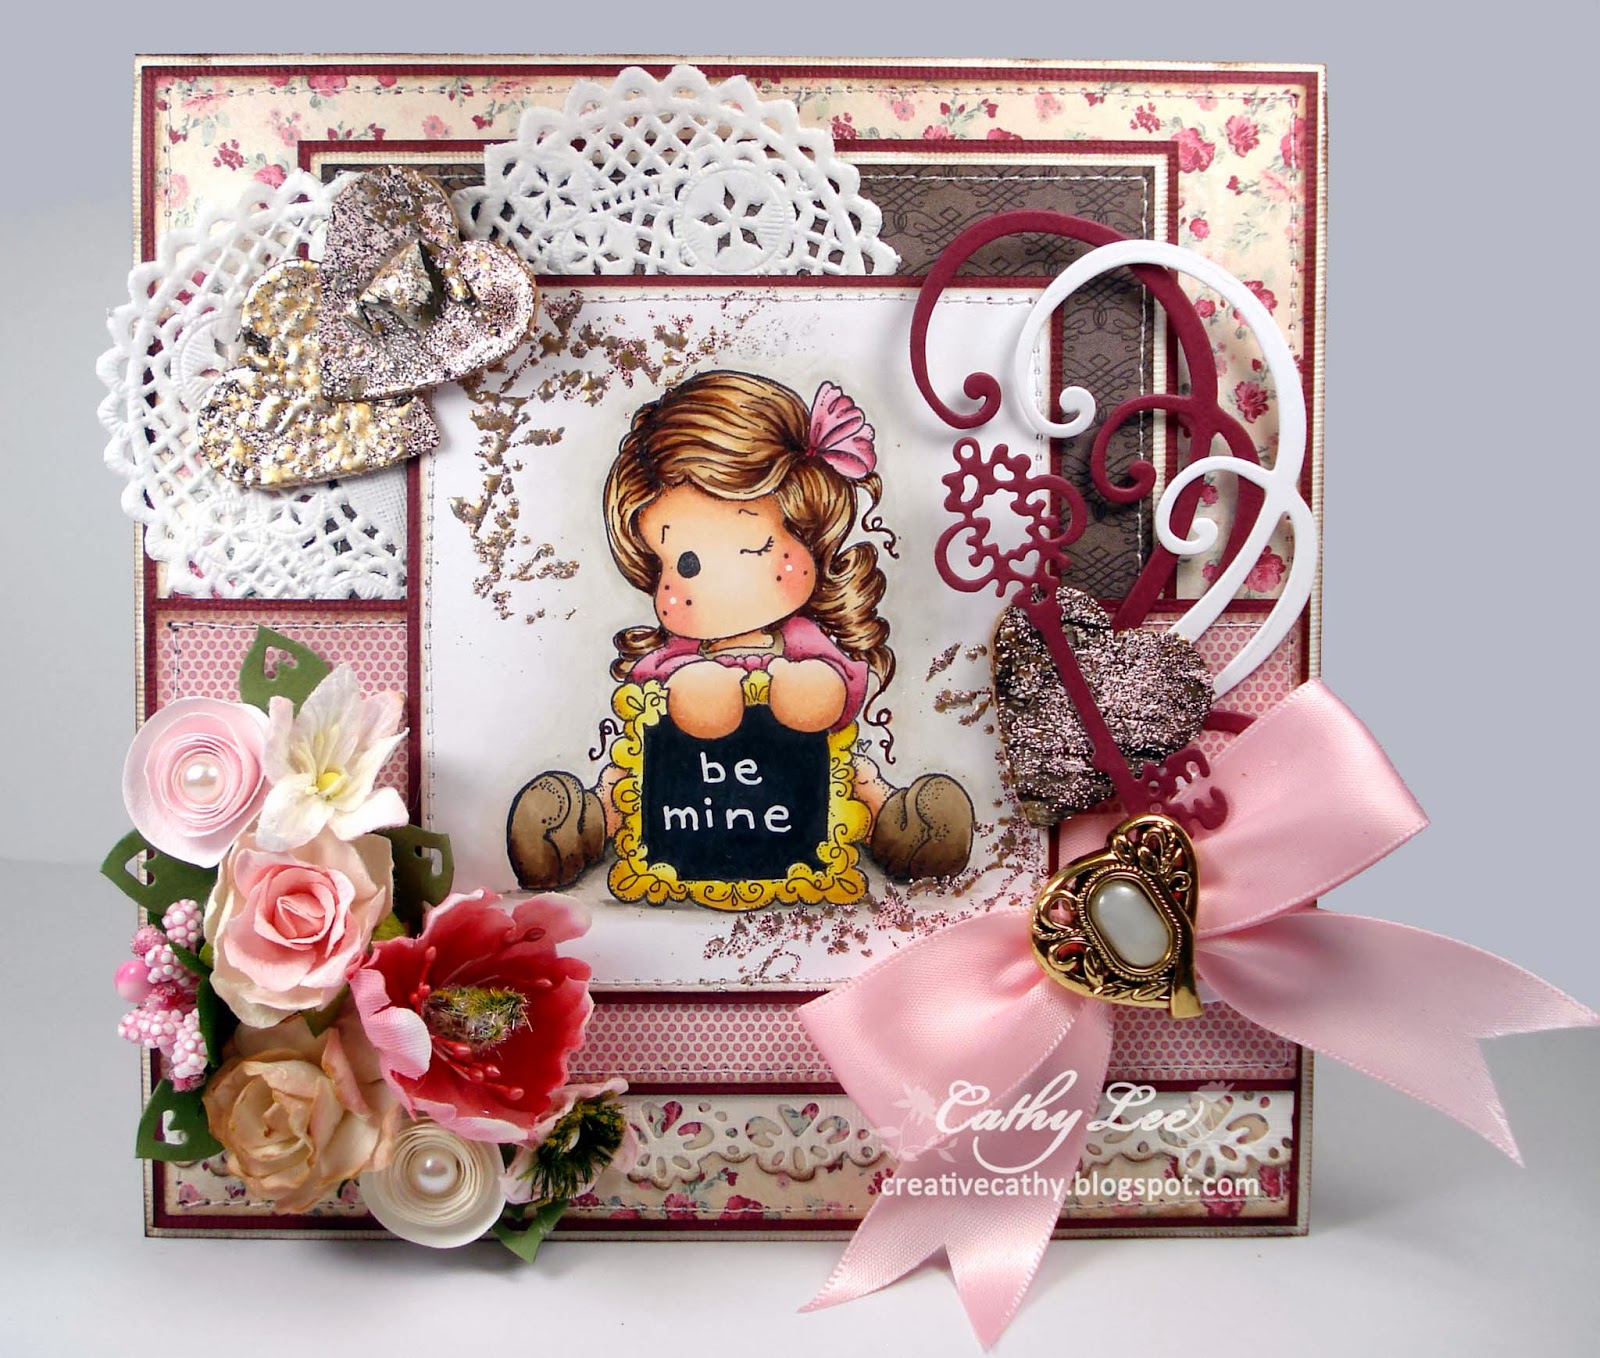
For my DT project I've chosen a new stamp from the Lovely Duo collection called “You are my Valentine Tilda.” Each character stamp in this collection is accompanied by a sweet sentiment stamp.

My designer papers are from Pion Design’s My Precious Daughter collection.  I love the pretty pink papers and love theme design. They are so easy to dress with a vintage shabby chic style as I've done here. I used The Paper Company ivory card stock for my base.


I colored Tilda with Copics to coordinate with my papers. I added a bit of glitter bling with Stickles to Tilda’s wings and the hearts I stamped randomly around the frame.

The new Oh-La-La DooHickey Die Club kit is perfect for a Valentine’s theme card. I cut several of them for this card which include the Eiffel Tower, Heart Flourish and Love Key all covered with Embossing Powder for that metallic effect.


Here’s a close-up of Tilda.

  
Leave a comment on any of the DT’s blogs and/or the Challenge blog for a chance to win a weekly prize from Magnolia-licious. The winner is announced every week during the “W”ednesday post.


Come and join us for the challenge and you may have a chance to win a Surprise from the Magnolia-licious store. As long as you follow our rules and theme you will be entered in the random winner draw at the end of the challenge. Good Luck!

Supplies:
Stamps – Magnolia: You are my Valentine Tilda, Arrow and Hearts
DPs/CS – Pion Design: My Precious Daughter; The Paper Company: Ivory
Dies –Magnolia Oh-La-La DooHickey Club Kit: Heart Flourish, Eiffel Tower, Heart Key, Love Birds Tab; Marianne Design: Large Oval by Petra LR0240
Flowers – Wild Orchid Crafts
Ribbon/Lace – The Ribbon Girl: Vintage Seam Binding
Ink – Tsukineko: Memento Tuxedo Black, Cocoa; Ranger: Pumice Stone DI
Other – Prima: Shabby Chic Treasures Door Locks; Ranger: Pink Taffeta Stickles, Gold Embossing Powder; Stampendous: Shabby Pink Frantage Embossing Enamel; Sprinkle & Sparkle: Firecracker Red Embossing Powder; Recollections: Flat back Pearls

Copics – Skin: E35, E11, E00, E000, R20, R30. Hair: E47, E44, E43, E42. Apparel: R85, R83, R81, RV00, Other: E44, E43, E41. BKGD: W5, W3, W1 W00, 0.

Thanks for stopping by. Have a great week.

Hugz,
Tuesday, February 11, 2014

Pretty in Pink at Magnolia-licious


Hello, Friends. We have another new challenge for you at Magnolia-licious. This fortnight our theme is…

PRETTY IN PINK


My card features a Write a Message Tilda from the new Lost and Found collection. I colored her with Copics and used some Frantage around her frame. Since St. Valentine’s Day is this week I made my pink card with a love theme.


I used some pretty pink papers from My Mind’s Eye and did a little stitching, distressing and added lots of textured elements.


Here’s a close up of this sweet Tilda.


Don’t forget to leave a comment on any of the DT blogs and/or the Challenge blog for a chance to win a weekly prize. The winner is announced every week during the “W”ednesday post.


Come and join us for the challenge and you will have a chance to win a Surprise from the Magnolia-licious store.

Supplies:
Stamps – Magnolia: Write a Message Tilda, Love Border
DPs/Cardstock – MME; Bazzill
Dies – Magnolia: Swirl die, Heart Flower Lace, Key Kit, Strawberry leaves.
Flowers – WOC, Prima, Magnolia, Kort & Godt and LLC
Ribbon/Lace – Michaels: Pink Satin
Ink – Memento: Tuxedo Black; Ranger: Walnut Stain DI; Versamark.
Other – Prima: Bark shapes; Stampendous: Aged Rose Frantage; JoAnn’s: Pearl Button; Recollections: Pearls; Royal Lace: Heart Doily.
Copic Colors – Skin: E13, E11, E00, E000, R20, R30. Hair: E29, E25, E31, E50. Apparel: R85, R83, R81, E47, E44, E43. Other: Yr23, Y15, Y11, C9, C7, W7, W5, W3, W2, W1, W0, W00, Colorless Blender.

Thanks for stopping by. I hope you have a great week.

Hugz,

Monday, January 16, 2012

My Bugaboo Valentine

Hi, Friends…Happy Monday! I hope you had a wonderful weekend. It has been cold here in Colorado. Our duck pond has been frozen for weeks. The actual pond size is almost 1/5 acre and it is frozen now to about 6 feet in diameter around the aerator. Hubby has been out of town for a couple days and he usually breaks up the edge twice a day so the ducks and geese have more room to swim.

A few days ago a herd of deer roamed and settled in our backyard right next to the house. I could see them from my craft room window so I had to get some pics to show you. If you subscribe to my blog via email you won't see the slideshow. You'll have to click the Title link above.  


The photos aren’t all that good as they were shot out the window at twilight so I adjusted them as much as I could to share them. We just love the country and the wildlife here is so awesome to watch.

“In the Bag or Box”
Craft Your Passion has a new challenge up for you. This week our theme is “In the Bag/Box.” So all you have to do is create a project that has a bag or box and you’re in. To get you started I’ve created my own heart shaped template after crafting my Valentine box and I’m happy to share it with you.

Here is a link to the pdf files. Heart Shapes and Box sides. You may need to trim a small amount of the box sides depending on how close to the lines you cut the heart shapes. If you'd like to see a tutorial, leave me a comment and I'll try to work on that is week.
Using my heart shape box template I created a Valentine candy gift box. And because it's heavy cardstock it can be loaded with sweet goodies. I prefer Hershey’s Hugs & Kisses; they are some of my favorite chocolates. Yummy!
I used my new Bugaboo Angels – Love You image from our wonderful sponsor Bugaboo Digi Stamps. I colored her with Copics and added a coat of stickles to her wings and glossy accents to her heart. I adhered her to my Magnolia Doo Hickey Scalloped Tag die and sponged Victorian Velvet Distress Ink around the edges. 
I printed the accompanying Bugaboo sentiment on the opposite side of the tag and distressed it as well.
For the box, I used my template as a pattern for 140 lb. cardstock and cut out all the pieces and assembled them. You can also use the pdf files to print on heavyweight cardstock or designer paper if your printer allows. I used Scor Tape around the edge of the top and bottom shapes to adhere the box sides for a strong hold. I punched several lengths of heart border with my Martha Stewart border punch and adhered them around the edges of the top and bottom. Then I covered my box with designer papers from Heidi Grace and pink satin ribbon with lace trim on the top side of the box. I also added DPs to the inside top and bottom layers for a finished look. I added pearl ribbon with glossy accents, some WOC flowers and a pink satin bow. I finished it off by attaching the tag. Now it’s ready for those chocolate goodies.
These are the Copics I used to color my image.

I’m entering my project in the following Challenges:

Papertake Weekly – Die Cuts
Make it Monday – Anything Goes
Anything Goes Challenge – Anything Goes
Crafty Catz – Use Something New
Paper Creations Ink - Love/Romance
Catch the Bug Challenge - Use 2 of Something (used 2 digi stamps)

Thanks for stopping by and have a great week…

Hugz,

Sunday, January 15, 2012

Tilda with Heart Lace

Hi, Friends. I hope you’ve enjoyed your weekend. Ours is coming to an end very quickly. I finished a card this afternoon. I had all my papers, sketch and image picked out and ready to go yesterday but needed to put it all together.
I received this sweet little “Tilda with Heart Lace” stamp and other goodies from Magnolia as a secret prize for the Magnolia-licious Highlites Wrapped Up Holiday Contest. And since St. Valentine’s Day is just around the corner, believe it or not, I just had to use her. She is from the “You Are So Special” collection.
I colored Tilda with Copics and used my Sharpie White Poster Paint pen to give her dress a polka dot pattern. This is a new technique I thought of while coloring her dress andjust had to try it. It was so fun and easy. The dots are shaded with my W5, W3 & W1 Copics for the shadows on her dress. Here's a close up of Tilda.

I made the butterfly embellishment myself using some Sheer red ribbon cut in a butterfly shape, tinsel glitter, Stickles, beads, wire and rhinestones. I’ve made several of these type of embellies so you are sure to see more of them on my projects. 

Here’s the rest of the supplies I used for my card.

Designer Papers – BoBunny Crush Collection
New Spellbinders – Heart Circles Die
Ribbon – Michaels
Flowers – Wild Orchid Crafts
Leaves – Cut from Martha Stewart Scandinavian Snowflake punch
Pearls - Reflections

These are the Copics I used to color Tilda.

I’m entering my project in the following Challenges:

Magnolia-licious Challenge – Pink, White & Red
Make it Monday – Anything Goes
Simon Says Stamp – Dots & Stripes
7 Kids College Fund – Try Something New
Crafty Catz – Use Something New (Stamp & Die)
Magnolia-licious Highlites – Anything Goes
Hooked on Craft Challenges - Try Something New
 

Thanks for stopping by. I’ll have another fun Valentine’s Day project for you tomorrow…Until then have a great evening. 

Hugz,

Related Posts Plugin for WordPress, Blogger...